Appearance
Install JoinedWorkz Studio
JoinedWorkz Studio is the desktop application for working with Canonical Model Notation (CMN) models. It provides:
- syntax highlighting and validation for
.cmnfiles - navigation and search across models
- tooling around platforms, cartridges and generators
Note: JoinedWorkz Studio requires a license key (trial or full).
The model transformation engine, generators and the Maven plugin are free to use and do not require a license.
This guide shows how to install Studio and configure a trial key, and how to open the joinedworkz-quickstart project from the Quickstart guide.
Prerequisites
Before installing JoinedWorkz Studio, make sure you have:
- a supported operating system (Windows, macOS or Linux)
- enough disk space for the application and your projects
JoinedWorkz Studio ships with its own Java runtime, so you do not need to install a JDK or JRE separately.
1. Download JoinedWorkz Studio
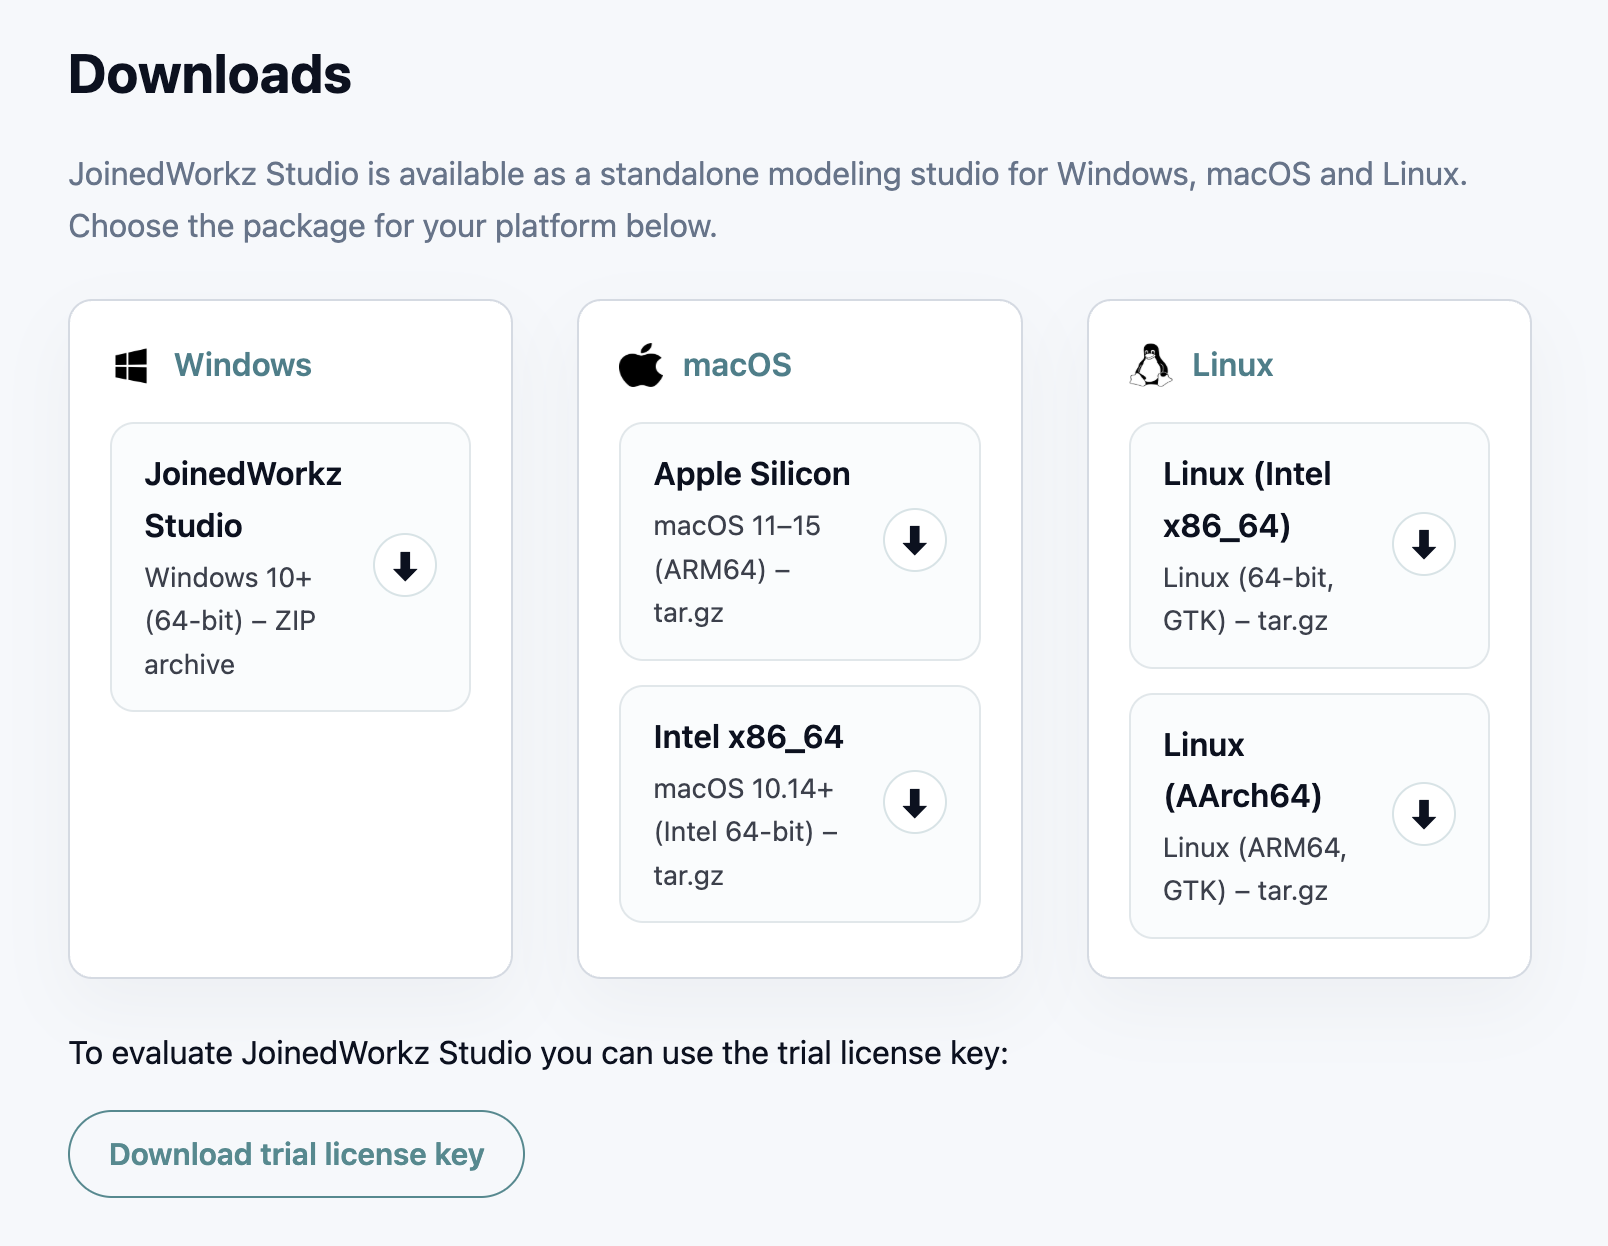
Open the official JoinedWorkz download page in your browser:
texthttps://www.joinedworkz.org/resources.htmlChoose the package for your platform:
- Windows – ZIP archive (64‑bit)
- macOS –
.tar.gzarchive (Apple Silicon or Intel) - Linux –
.tar.gzarchive (for your CPU architecture)
Download the archive to a folder of your choice (for example
Downloads).
Extract the archive:
Windows
Right‑click the downloaded.zipfile and choose
“Extract All…”.
Extract it to a folder such asC:\Tools\JoinedWorkzStudioor any other location where you keep developer tools.macOS
Double‑click the downloaded.tar.gzfile in Finder.
This creates an extracted folder (for exampleJoinedWorkzStudio) next to the archive. Move this folder to yourApplicationsfolder or to another location of your choice.Linux
Use your file manager’s “Extract here” function
or run in a terminal:bashtar -xzf <downloaded-file>.tar.gz -C <target-directory>Replace
<downloaded-file>.tar.gzwith the name of the file you downloaded and<target-directory>with the folder where you want to install Studio (for example/opt/joinedworkz-studioor~/apps).
The exact file names may change between releases.
Always download the latest archive for your operating system from the JoinedWorkz resources page.
2. Installation layout and file locations
After you have extracted the JoinedWorkz Studio archive, the application is already installed. There is no additional installer to run and no changes are made to the system registry.
JoinedWorkz Studio is almost portable:
- you can move the extracted folder to any location where you have write access (for example
C:\\Tools\\JoinedWorkzStudio,/Applicationsor~/apps/joinedworkz-studio), - on first start, Studio only creates a small directory in your user home folder to store license information.
2.1 Application files
The extracted archives contain at least the following files and folders:
Windows
JoinedWorkz.exe– main executableJoinedWorkz.ini– configuration fileartifacts.xml,configuration/,features/,p2/,plugins/,readme/– runtime and plugin infrastructure
macOS
JoinedWorkz.app– application bundle containing all required files
Linux
JoinedWorkz– main executableJoinedWorkz.ini– configuration fileartifacts.xml,configuration/,features/,p2/,plugins/,readme/– runtime and plugin infrastructure
You normally do not need to modify these files manually. The important part for running Studio is the executable:
JoinedWorkz.exeon WindowsJoinedWorkz.appon macOSJoinedWorkzon Linux
2.2 Linux execute permissions
On Linux, ensure that the JoinedWorkz launcher is executable. In many cases this is already set in the archive, but if Studio does not start, check and adjust the permissions, for example:
bash
chmod +x JoinedWorkzYou can then start Studio from a terminal:
bash
./JoinedWorkzor by double-clicking it in your file manager (depending on your desktop environment and its settings).
2.3 Where license files are stored
When you start JoinedWorkz Studio and add a license file, Studio creates (if necessary) a directory inside your user home folder:
text
.joinedsystems/joinedworkz/licenseAll license files you add via Add License... are stored in this directory. You normally do not need to access or edit this folder manually; it is useful to know about it if you are backing up or migrating your user profile.
With the extracted application folder in place and the permissions set, you are ready to start Studio for the first time (see the next chapter).
3. Start JoinedWorkz Studio
When you start JoinedWorkz Studio for the first time, two dialogs are shown one after the other:
- Select workspace
- Add license (if no valid license is found yet)
3.1 Launch
Launch JoinedWorkz Studio from the folder where you extracted the archive:
- Windows – double-click
JoinedWorkz.exe - macOS – double-click
JoinedWorkz.app - Linux – run the
JoinedWorkzlauncher script/binary
(If you integrate Studio differently on a given platform, adapt this list to your distribution.)
3.2 Select workspace
On first launch, Studio asks you to select a workspace folder.
The workspace is the folder where JoinedWorkz stores metadata and log files for your projects. It does not have to be the same folder in which your projects and model files are located.
Choose a directory that:
- you have write access to, and
- you are comfortable using for Studio-specific data (for example
C:\\Users\\<you>\\joinedworkz-workspaceon Windows or~/joinedworkz-workspaceon macOS/Linux).
You can change the workspace later if needed.
After confirming the workspace, Studio continues starting and, if necessary, shows the license dialog.
4. Add license and trial key
During startup, JoinedWorkz Studio checks whether a valid license is available for the selected workspace. If no license is found, a License dialog is shown.
4.1 Add a license file
Licenses are provided as license files. To add a license:
- In the License dialog, click Add License....
- In the file chooser, select the license file you have downloaded.
- Confirm the selection.
Studio validates the license file and adds it to your workspace. Once a valid license is present, close the dialog and Studio continues starting normally.
You do not paste a license key string into Studio.
Instead, always add the downloaded license file via Add License....
4.2 Trial license
For evaluation, you can use a trial license:
- The trial license is fully functional and has no technical limitations.
- It is time-limited and expires after a certain period.
- You can download a trial license directly from the JoinedWorkz website without any additional prerequisites (for example via the trial license link on the resources page).
If you need a non-expiring license or commercial support, please contact JoinedWorkz directly via the contact options on:
text
https://www.joinedworkz.org/about.htmlWe provide details on available licensing and support options.
5. Open the Quickstart project in Studio
Once Studio is installed and licensed, you can open the project created in the Quickstart.
- Start Studio.
- Choose File → Open Project (or the equivalent menu entry).
- Navigate to the
joinedworkz-quickstartdirectory created in the Quickstart. - Confirm to open the project.
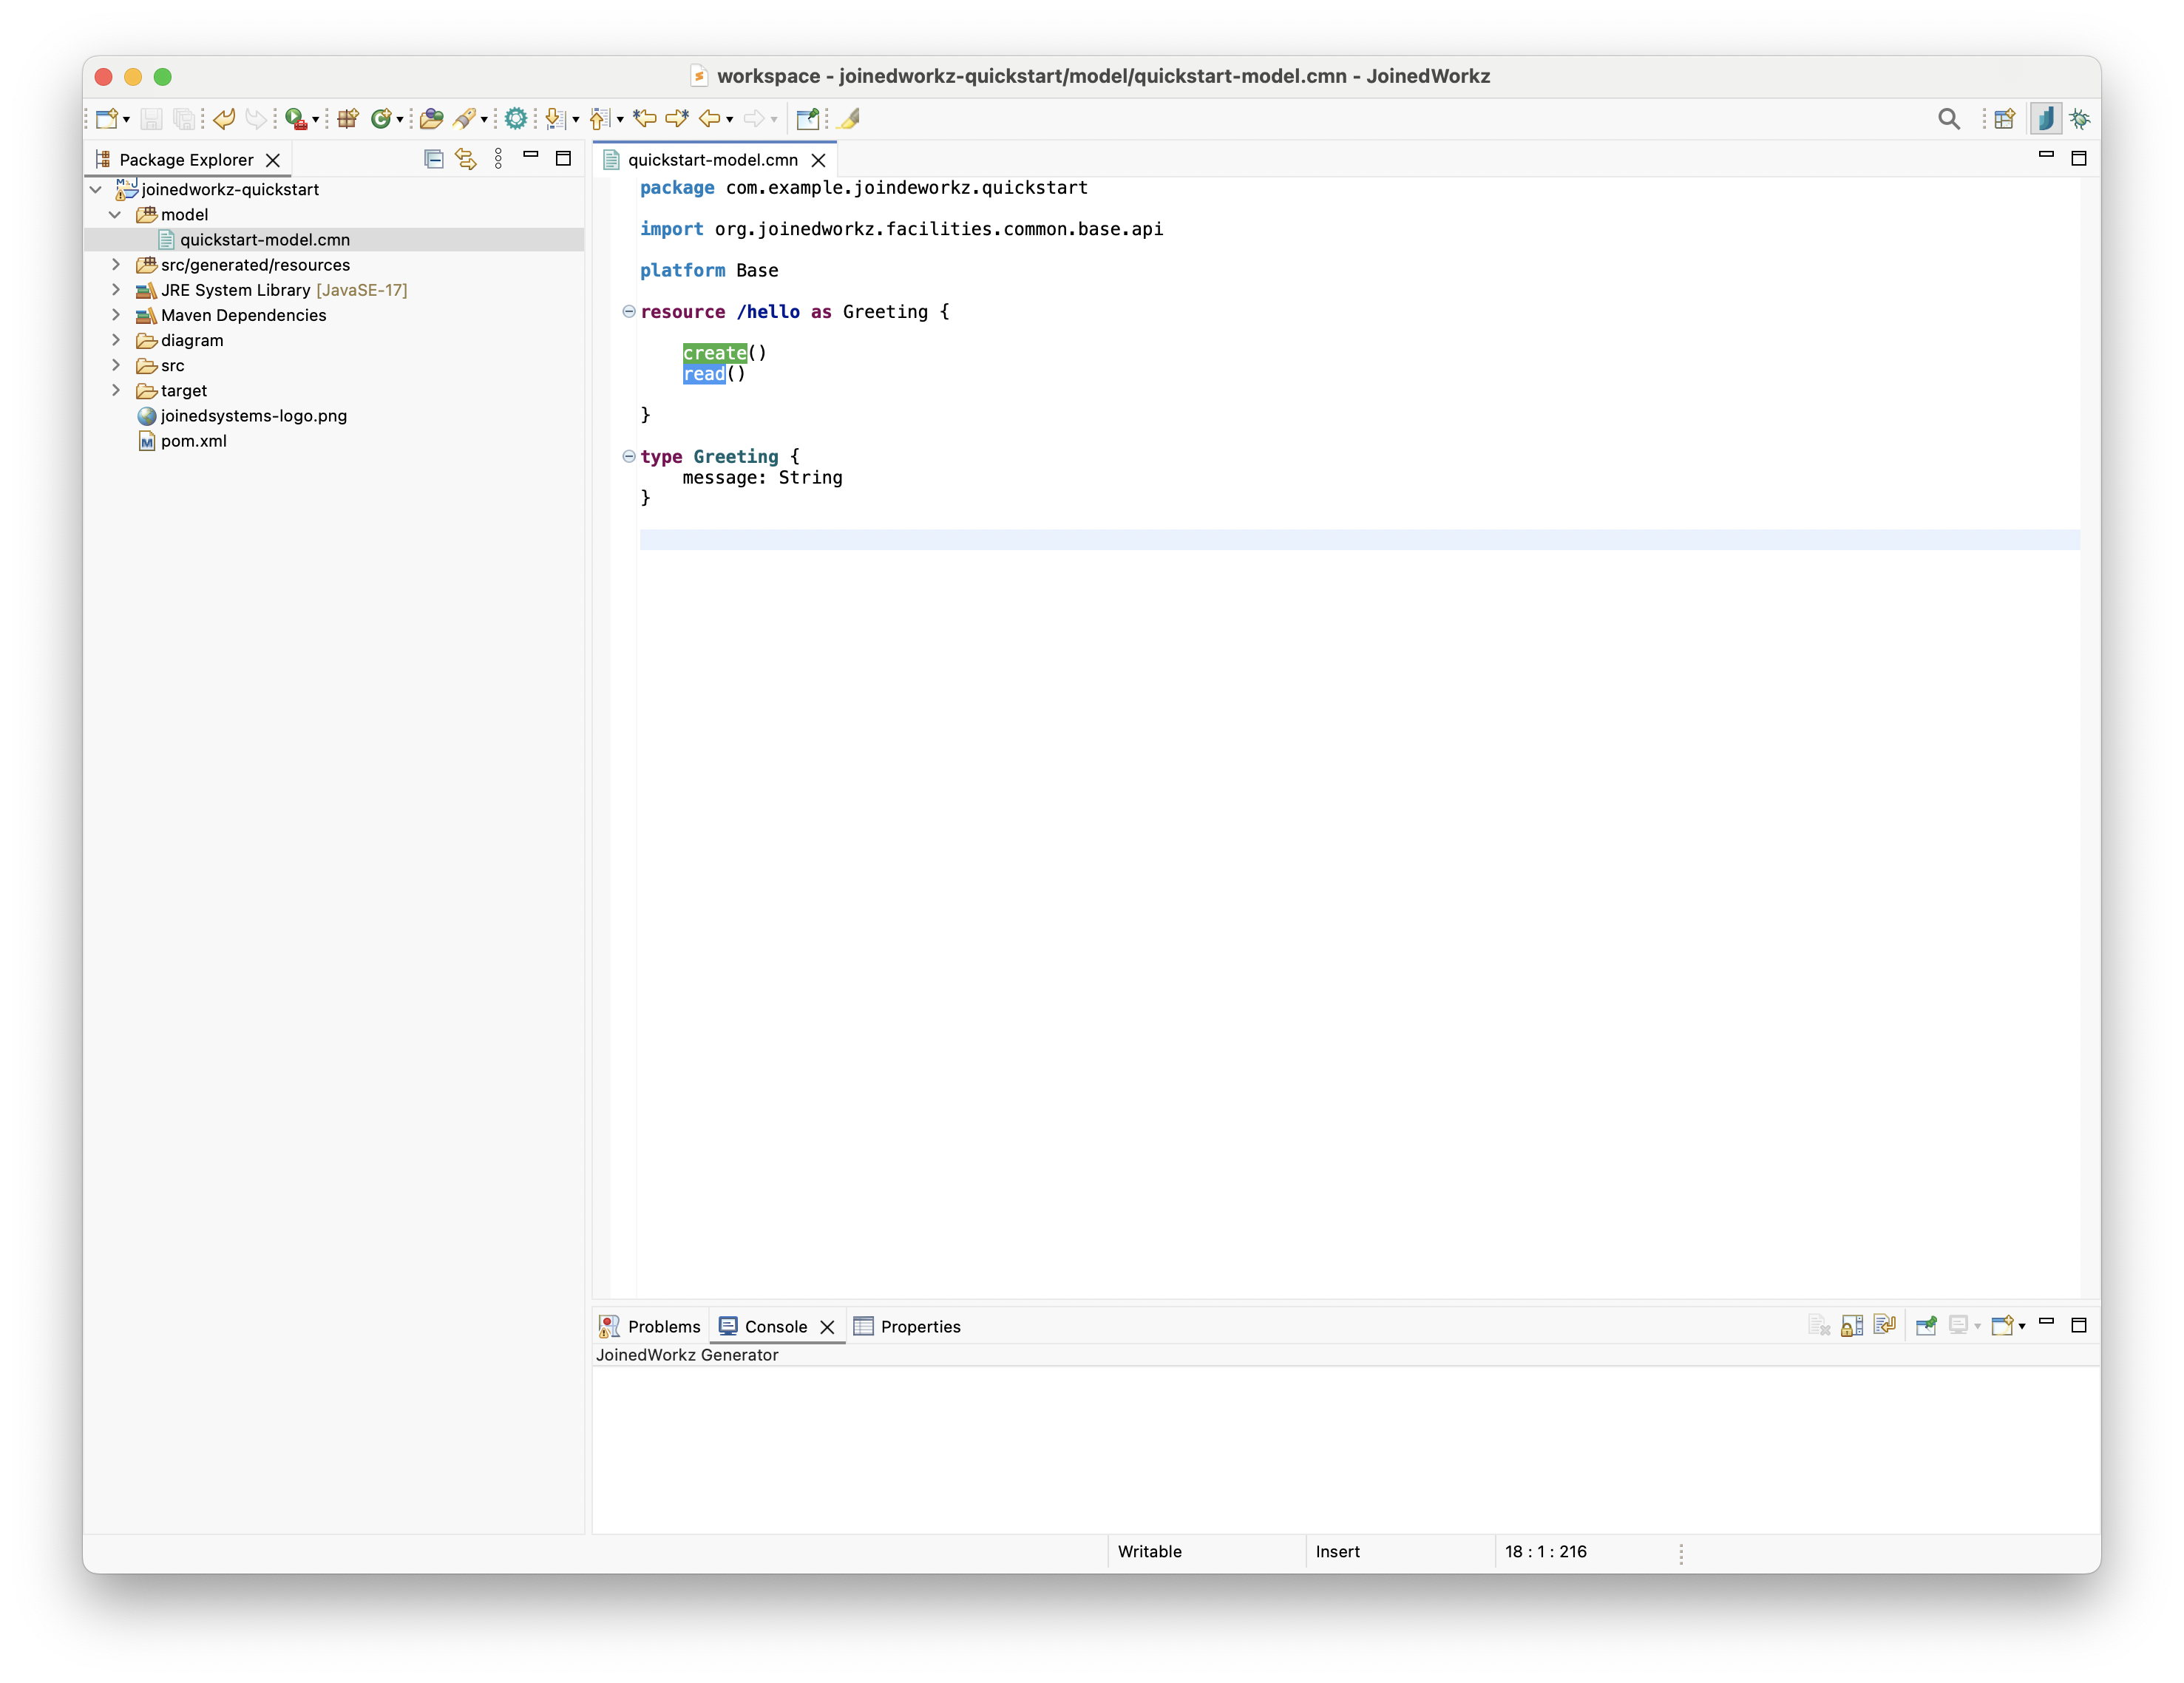
Studio should now show:
- the project in its project explorer
- the
modeldirectory - the file
quickstart-model.cmn
Open quickstart-model.cmn and verify that:
- the file is recognized as a CMN model
- syntax highlighting is active
- there are no unexpected validation errors
6. Next steps
From here you can:
- start editing the model in Studio and re-run the Maven build to regenerate the OpenAPI YAML
- explore additional platform and generator configurations
- follow the How-to guides, starting with
Create a model and apply an existing generator
For details on the concept behind Studio and the build tooling, see: